
Many gardeners are unfamiliar with Jerusalem artichokes, although they may know them by their common name, perennials of the sun. Jerusalem artichokes, also known as Jerusalem artichokes, or Canadian truffles, are native to North America and have nothing in common with the artichokes found at your local grocery store. Nothing is easier than planting a Jerusalem artichoke, and growing and spreading them is even easier, they can even quickly become invasive. If you live in France or somewhere with the same climate, you should try growing them. But beware, once you have Jerusalem artichokes in your garden, you’ll have a hard time changing your mind!
Jerusalem artichokes in their garden:
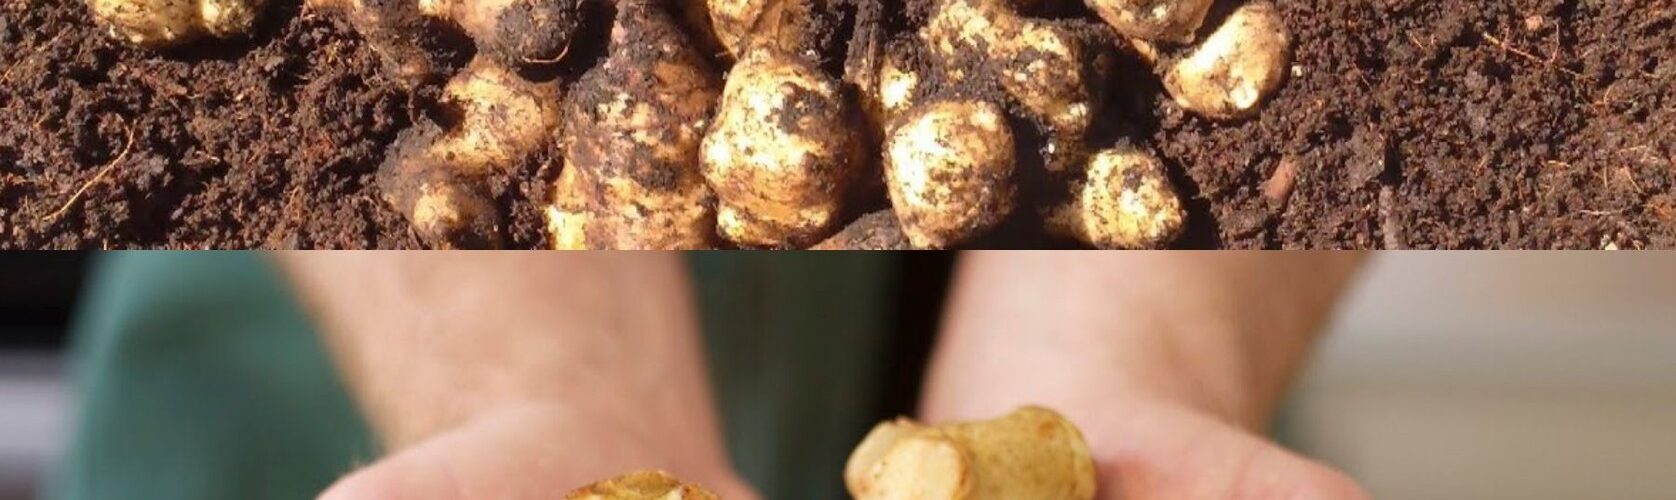
Jerusalem artichoke plants (Helianthus tuberous) are perennial relatives of the sunflower. Edible portions are the tubers that grow underground.
The tubers are harvested in the fall by burrowing under the plant. They can be baked like a potato, fried or boiled, or eaten raw with a taste and feel similar to water chestnuts.
If you or a loved one has diabetes, growing Jerusalem artichokes can be beneficial. Instead of carbohydrates, tubers contain inulin which is broken down during digestion into fructose, which is preferable to glucose.
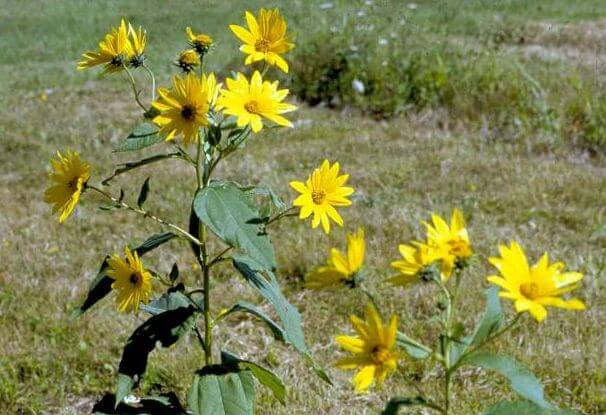
Jerusalem artichoke plants can reach 1.8 m in height and are covered with 5 cm flowers in late August and early September. The flowers are a bright and cheerful yellow. The leaves are about 7 cm wide and 8-15 cm long.
Much more difficult than learning how to grow Jerusalem artichokes is knowing where they can be found to start growing. Most garden centers don’t sell it, but many catalogs do, and sometimes you can find it on the internet (http://amzn.to/2rS3SZh). Or you can use the D-system method and try planting Jerusalem artichokes you bought at the grocery store, preferably organic.
How to grow a Jerusalem artichoke:
How to grow a Jerusalem artichoke in the garden. While Jerusalem artichoke plants grow and produce flowers in almost any type of soil, yields are best when planted in well-aerated, well-drained soil. The plants also produce higher yields in slightly alkaline soil, but for the novice gardener, neutral soil will work well. An all-purpose fertilizer should be added to the soil when planting. Planting Jerusalem artichokes is very similar to planting potatoes. Small tubers or pieces of tubers with two or three buds are planted 5 or 6 cm deep, about 60 cm apart, in early spring, as soon as the soil can be worked. The plantation should be well watered initially.
Maintenance of Jerusalem Artichokes:
The care of Jerusalem artichokes is quite basic. Light care and weeding should begin as soon as the shoots break through the soil. However, once the plants are established, no maintenance is required. Watering is essential and the plants should receive at least 1 good watering per week to promote good tuber growth. Flowering begins in August, a sight to behold. When the plants start to turn brown in September, it’s time to harvest your first Jerusalem artichokes. Care should be taken to dig deep enough so as not to damage the delicate skin of the tubers. Harvest only what you need. Cut back dying plants, but leave the tubers in the ground.
Now, one last tip before you start growing Jerusalem artichokes, any bits of tuber left over during the winter will grow and your garden in the spring can easily be overwhelmed with invasive Jerusalem artichokes so much so that some gardeners refer to them as downright weeds.
On the other hand, if you assign a corner of the garden to Jerusalem artichokes, their development can become even easier as the plants replenish. Give your Jerusalem artichoke garden a dose of fertilizer every spring.
Nothing simpler than going for it!