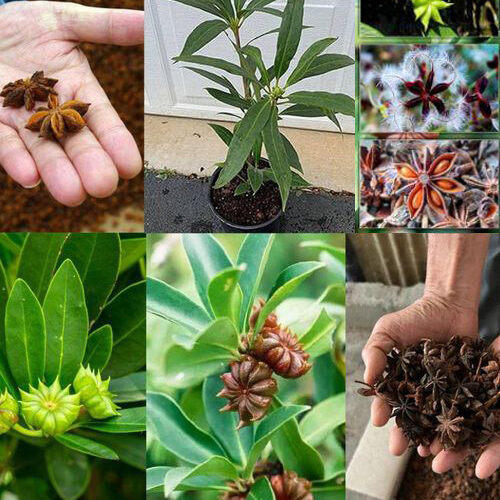
Star anise (Illicium verum) is a fragrant spice that has been used for centuries in cooking, as well as in traditional medicine for its various health benefits. Known for its sweet, licorice-like flavor, star anise is a key ingredient in many dishes, particularly in Asian and Indian cuisines. Growing this unique plant in pots is a fantastic way to bring a little piece of the exotic into your home or garden, especially if you live in cooler climates where growing it outdoors might be challenging.
In this guide, we’ll walk you through the steps to successfully grow star anise in pots, providing all the essential tips and tricks to ensure your plant thrives.
Why Grow Star Anise in Pots?
- Ideal for Small Spaces: If you have limited outdoor space or no garden, growing star anise in pots is a perfect solution. Pots can be placed on balconies, patios, or windowsills, allowing you to enjoy this fragrant herb even in urban environments.
- Control Over Growing Conditions: Pots give you more control over the growing environment, especially in terms of soil quality, watering, and temperature, which is essential for star anise, as it thrives in specific conditions.
- Decorative Plant: Apart from its culinary uses, star anise is also an attractive, evergreen shrub with glossy leaves, making it a great addition to any home or garden.
Step-by-Step Guide to Growing Star Anise in Pots
1. Choose the Right Pot
- Select a pot that is large enough to accommodate the plant’s growth. A 12- to 16-inch wide pot should be suitable for most star anise plants, but make sure it has drainage holes to prevent waterlogging.
- Star anise has a deep root system, so ensure that the pot is at least 12 inches deep.
2. Select the Right Soil
- Star anise prefers well-draining, slightly acidic soil. A mix of potting soil with sand or perlite will allow for good drainage and prevent root rot.
- Avoid using heavy, compacted soil that retains too much moisture. You can also add some compost to enrich the soil and encourage healthy growth.
3. Ideal Location for Star Anise
- Star anise thrives in warm, tropical climates, so choose a location that gets plenty of sunlight. Ideally, the plant should receive at least 4-6 hours of indirect sunlight per day.
- If you live in a cooler climate, keep the pot in a sunny spot indoors during the colder months, or consider growing it in a greenhouse or under grow lights.
4. Planting the Star Anise
- When planting star anise, start by filling the pot with the soil mixture, leaving a small gap from the top. Plant the star anise sapling or seeds about 1-2 inches deep.
- Gently water the plant after planting, but avoid soaking it. Ensure that the pot has proper drainage to prevent water from sitting at the bottom.
5. Watering Needs
- Star anise plants like moist soil, but they do not tolerate soggy roots. Water the plant regularly, especially during the hotter months, but ensure that the soil is well-draining.
- Reduce watering during the winter months when the plant is not actively growing. Always check the soil moisture before watering to avoid over-watering.
6. Fertilizing Star Anise
- Fertilize the plant once every 4-6 weeks with a balanced, water-soluble fertilizer during the growing season (spring through summer). Avoid over-fertilizing, as this can lead to weak, leggy growth.
- In winter, you can reduce fertilizing since the plant’s growth slows down.
7. Pruning and Maintenance
- Regular pruning will help keep your star anise plant healthy and encourage bushier growth. Trim away any dead or damaged branches to allow for new growth.
- If your plant becomes too tall or leggy, prune back some of the top growth to maintain a more compact shape.
8. Temperature and Humidity
- Star anise prefers warm, humid environments. Try to maintain temperatures between 60°F to 85°F (15°C to 29°C) for optimal growth.
- If you’re growing star anise indoors, consider placing a humidity tray near the plant or using a humidifier to provide extra moisture in the air.
9. Harvesting Star Anise
- Star anise plants typically take several years to mature and start producing their iconic star-shaped fruits, which are used as the spice.
- When the fruit begins to mature, it turns a brownish color. Harvest the star anise pods by carefully plucking them from the plant. Allow the pods to fully dry before storing them.
10. Winter Care
- During the colder months, the plant will not grow actively. Reduce watering and store the pot in a location that stays above freezing to avoid damage. If the plant is kept indoors, ensure it still receives some light.
Troubleshooting Common Problems
- Yellowing Leaves: This could be a sign of overwatering or insufficient light. Ensure the plant is in a bright location and that the soil drains well.
- Wilting: If the leaves are wilting, it could be due to underwatering or a lack of humidity. Try to adjust your watering routine and increase humidity levels.
- Pests: Like any plant, star anise can be susceptible to pests like spider mites or aphids. If you notice pests, treat the plant with insecticidal soap or neem oil.
Conclusion: Enjoy Your Homegrown Star Anise
Growing star anise in pots is a rewarding experience that allows you to enjoy the fragrance and flavor of this unique spice right at home. Whether you’re adding it to your favorite recipes or simply enjoying its beauty as an ornamental plant, star anise is a wonderful addition to any garden or indoor space.
If you found this guide helpful, don’t forget to like and share this post with your friends and family. Spread the word about the benefits of growing your own spices, and inspire others to try their hand at cultivating star anise in pots!