
Introduction
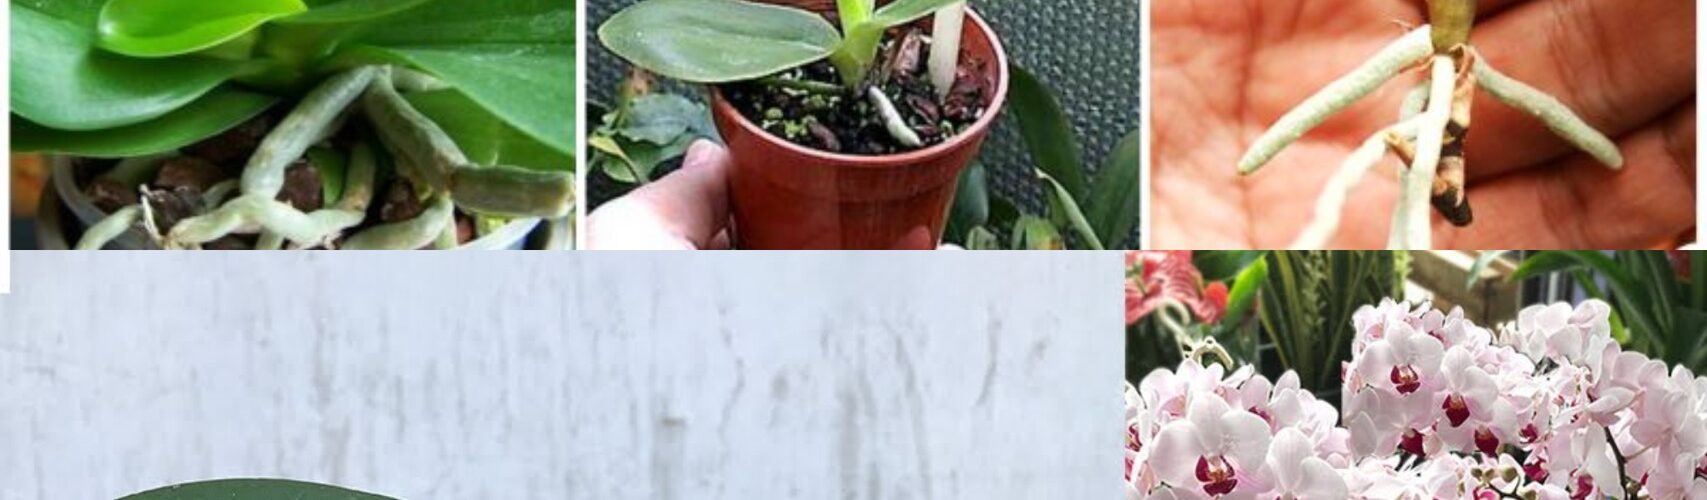
Orchids are fascinating tropical plants loved for their beauty and the variety of their flowers. Propagating orchids from a single leaf is an exciting way to create new plants and enjoy their elegance in multiple places in the home. In this step-by-step guide, we’ll explore the process of propagating orchids using a single leaf step-by-step.

1. Choosing the right leaf
1.1. Examine the leaf to ensure it is healthy and free of damage or disease.
1.2. Check that the leaf has at least one pseudobulb or leaf node on the underside.
2. Prepare the material and container
2.1. Use a soil specifically designed for orchids, such as pine bark or sphagnum moss.
2.2. Make sure the container has drainage holes to prevent water from stagnating.
3. Cut the leaf
3.1. Use a sharp, sterilized knife to cut the leaf at the base.
3.2. Make sure the cut is clean and free of tearing or crushing.
4. Plant the leaf in the ground
4.1. Place the leaf in the soil with the cut side facing down.
4.2. Lightly cover the base of the leaf with fresh soil.
5. Provide optimal growing conditions
5.1. Place the container in a bright and indirectly lit place.
5.2. Keep the soil moist, but not excessively wet, to prevent root rot.
6. Monitor and care for the seedling
6.1. Check the leaf regularly for new root formation.
6.2. Water the seedling in moderation and occasionally spray the leaves with water to maintain moisture.
7. Transplant the seedling
7.1. Transplant the seedling into a larger container once it has developed healthy roots and new leaves.
7.2. Continue to care for and monitor the seedling as it grows and develops.
By following these steps carefully, you will be able to successfully propagate your orchids from a single leaf and enjoy the rewarding process of seeing new plants grow. Remember to be patient and pay attention to your orchid’s specific needs throughout the propagation process. Good luck and happy gardening!