In addition to being considered a true superfood with multiple health benefits, garlic is also an essential ingredient that provides a unique flavor to all our culinary recipes. Can you imagine being able to enjoy all its benefits without having to buy it every time you shop at the supermarket? Would it be possible to germinate garlic easily at home? Apparently YES… Explanation!
Is it possible to grow garlic indoors?

You can grow garlic perfectly as a houseplant. It is enough that:
- Your pot should be equipped with a drainage hole at the bottom.
- Your plant is placed in a bright place where it can benefit from the sun’s rays.
- You place your plant in a dry room. Garlic fears excess water and humidity.
However, growing garlic at home can have some disadvantages. And it lies in the way of growing it indoors that is something different. Clearly, it is impossible to expect your pods to develop into real bulbs after just a few weeks in the ground. Sure, you can harvest garlic leaves instead, which can be chopped raw to add to salads, garnish soups, add flavor to stir-fries, and enhance the flavor of many recipes.
How to grow garlic in water?

If you live in an apartment or don’t have space to grow garlic in your garden, our ingenious method is a great alternative. Follow the guide to see how to do it:
- Select the correct garlic cloves: This is a necessary step, dear readers! Opt for sprouted pods (those with a small green button on the top). Otherwise, you will need to take a whole bulb and cut off the pointed end with a knife.
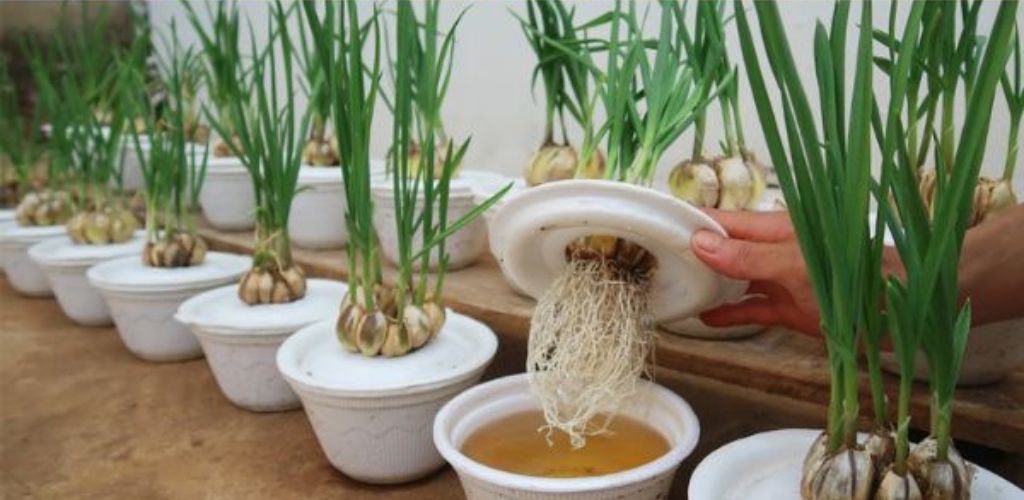
- Prepare your container: Get a transparent glass container (to follow the germination of your plant) that can hold approximately 250 g of water.
- Separate the garlic bulbs into individual cloves: Place each clove (with its skin) along the sides of the container, making sure the pointed or sprouted end is facing you. up.
- Add water: Fill your container with warm water, just enough to cover the bottom of your garlic clove. It is important not to submerge them, because they can die!
- Wait a moment: Place your container in a very sunny location for about a week. But don’t forget to replenish the water if necessary. If the tops of the pods begin to change color and turn brown, place your bowl out of direct sunlight for 1 or 2 days.
- Harvest garlic sprouts: when the seedlings reach at least 8 cm in height. Cut them with scissors. That said, take only as much as you need, as these quickly lose their flavor. Also keep in mind that after the first harvest, your garlic will definitely not produce any more sprouts.
- ENJOY: With these simple steps, you can now enjoy your garlic for your culinary needs!
Here is a video to guide you step by step:
How to grow garlic from a clove with the can trick?
Vegetables are usually grown from seeds, but to grow garlic, you simply need to plant individual cloves! Check out our guide to show you how:
- To start, cut the bottom half of a 5 liter container and poke 4 holes in the bottom.
- Fill your pot with potting soil and make 3 holes about 10cm deep.
- Carefully remove 3 cloves of garlic from the water, being careful not to damage the roots.
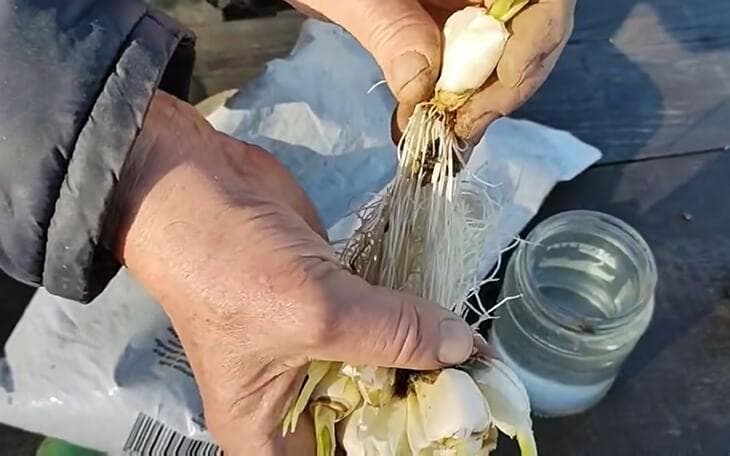
- Next, cut the roots lightly, about 3 cm from the stem.
- Insert one clove per hole (stem facing up) and cover them with a little soil.
- Pour the water from the container the garlic cloves or head were in into your new pot.

- All you have to do is wait a few weeks, dear readers, and your potted garlic will be ready to eat! a>
You can also use this technique to plant garlic directly into the soil in your garden.
Autumn-winter-spring sowing: when and how to plant garlic outdoors?
If you want to be successful in planting garlic, it is essential to follow a methodical and well-defined program! Therefore, it should be noted that garlic generally requires a cold period (0 to 10°C) to produce quality bulbs, i.e. 1 to 2 months. That’s why gardeners usually plant it in late fall or early winter. In other words, to obtain satisfactory results, it is necessary to proceed between October and February. However, for your information, dear readers, some varieties are suitable for planting in early spring.
How to grow garlic in the garden or in a vegetable garden?
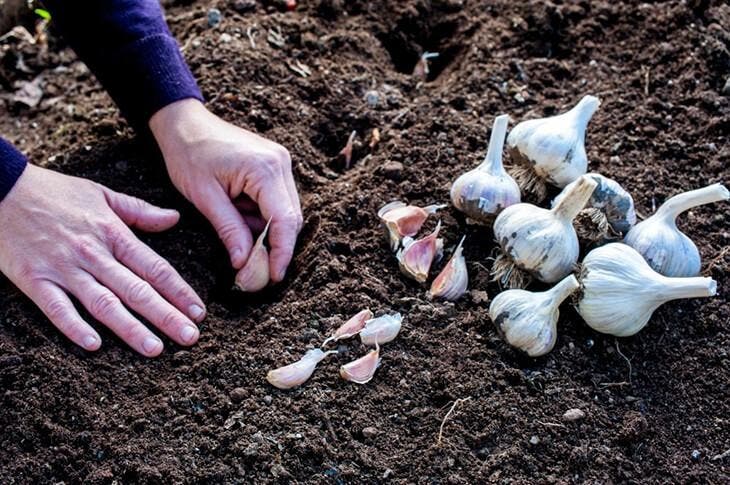
- Prepare your soil: Garlic needs a sunny, well-drained location to grow. However, avoid planting it in acidic soils (with a pH lower than 6.5).
- Plant your pods – Break the bulbs into individual pods and, while keeping the skin on, bury them 3-4cm deep below the soil surface, with the root down and the pointed end up! Space them 15 cm apart.
- Water your plants: During periods of drought, be sure to water your garlic well to encourage bulb growth. Avoid wetting the leaves, as this can lead to fungal diseases. Stop watering completely during the last few weeks of growth (yellow foliage and well-formed bulbs).
How long does it take to grow garlic?
Growing your own garlic from cloves takes about 6 to 7 months. If you plant garlic cloves in the middle of winter, you can enjoy them between June and August.
How to harvest garlic?
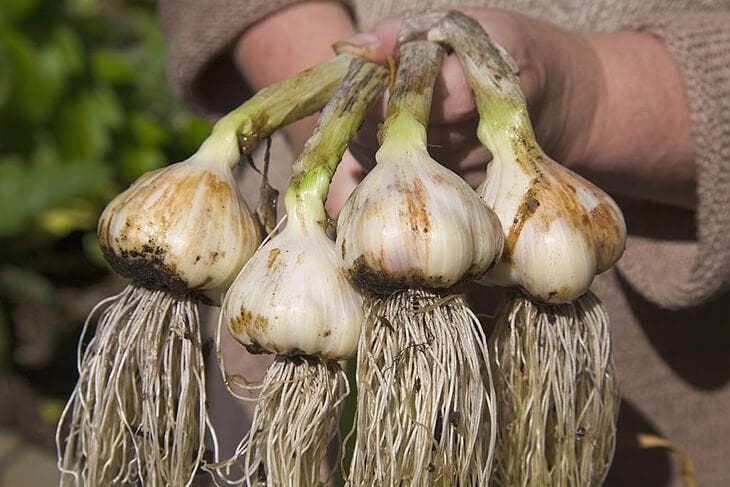
If you’re wondering when is the best time to harvest garlic, watch for signs that your plant is ready: yellow or brown leaves and drooping heads. Do you need to know how to harvest? Follow our advice:
- Carefully dig up the garlic bulbs from the soil with a garden fork.
- Then dry them well by exposing them to sunlight or placing them in a dry, well-ventilated place. The drying process takes between 2 and 4 weeks. Be careful, if mold appears, use a fan heater to speed up drying.
- Once the garlic leaves are very dry and crisp, cut the bulbs and store them in a dry place so they will keep for several months.
Keep in mind :
If you harvest too early, the pods will not be well formed, and if you harvest late, the bulbs may split open and not last long!
As you may have understood, dear readers, growing garlic is very easy at home , and you do not need to have a dedicated planting space to grow it .